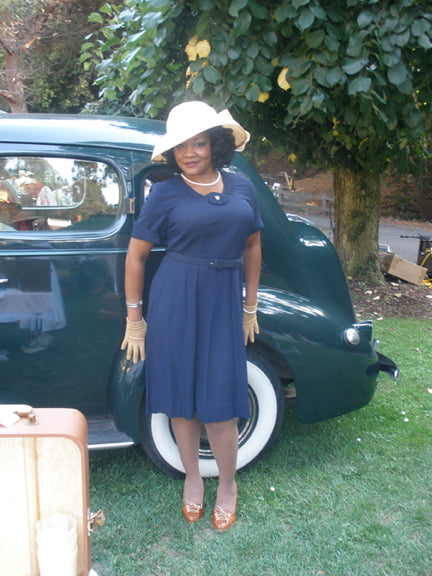
On the Boards for 2012...
Now out for release is this pattern I have been wanting to do for 12 years!
The original art for this pattern was not in good shape, so all I have is this view of the front (if anyone has access to a good stock image of this pattern McCall 6983 I would appreciate knowing about it!):
The following 1930's McCall patterns are certainly quite 'luxe' and therefore, fit the bill for the coming year! I plan to issue one each quarter throughout '12 (starting in May):
Friday, December 23, 2011
Thursday, December 22, 2011
EvaDress 2012 Pattern Catalogue
Friday, November 25, 2011
Exercise from ASDP Session on 11.12.11
There was one major exercise we did not cover.
The objective in looking at the design below was to address the challenge of augmenting a smaller bust line with transverse gathers:
The solution exercise regarded using rayon seam tape to stay multiple gathered edges which are then joined with un-gathered sections of the over-bodice. The muslin study below is demonstrated in 1/2 scale.
My digital camera died, so this is as far into the process I can share until I have a camera in hand again.
I first ran a hand-basted stitch along the (5/16") seam allowance to join the pieces in each of the two sets:
The 1/4" wide white paper strip demonstrates the rayon seam tape. Per the original instructions, 1. Stitch BODICE RIGHT FRONT to BODICE RIGHT SIDE FRONT below o at corner as illustrated, matching VV-V, clipping side front to o. Press open.
(In these two images each 1/4" paper strip is cut the length that each piece of seam tape should be as they correspond to the straight edges along which gathers will be eased when joining pieces. The gathered stitch along the left curved edge in the top image is for drawing into gathers in the next step):
As the other image above corresponds to the original instruction illustrations:
2. Gather BODICE RIGHT SIDE FRONT above seam, to large O.
Shows the hand basting stitch drawn to a gathered edge on the bodice left side front:
3. Turn under seam allowance on BODICE RIGHT FRONT from seam to O and pin over BODICE RIGHT SIDE FRONT, clipping to O. Slip-stitch securely.
4. Stitch BODICE LEFT FRONT to BODICE LEFT SIDE FRONT, below o at corner, matching VVV, clipping side front. Press open.
Shows The taped and gathered edge of bodice left side front joined in the seam with bodice left front:
5. Gather left side front from seam to first point, as illustrated.
6. Pin left side front to BODICE LEFT FRONT, matching VV, adjusting gathers. Baste and stitch. Press seam downward.
Shows the gathered and taped edge of bodice right side front before it is eased and stitched to the bodice right front:
7. Clip BODICE RIGHT FRONT to large O, stitch to BODICE LEFT FRONT below oo, matching O’s and V.
8. Gather BODICE LEFT SIDE FRONT above seam at oo to the triangle symbol as illustrated.
Detail shot of the gathered bust:
The solution exercise regarded using rayon seam tape to stay multiple gathered edges which are then joined with un-gathered sections of the over-bodice. The muslin study below is demonstrated in 1/2 scale.
My digital camera died, so this is as far into the process I can share until I have a camera in hand again.
I first ran a hand-basted stitch along the (5/16") seam allowance to join the pieces in each of the two sets:
The 1/4" wide white paper strip demonstrates the rayon seam tape. Per the original instructions, 1. Stitch BODICE RIGHT FRONT to BODICE RIGHT SIDE FRONT below o at corner as illustrated, matching VV-V, clipping side front to o. Press open.
(In these two images each 1/4" paper strip is cut the length that each piece of seam tape should be as they correspond to the straight edges along which gathers will be eased when joining pieces. The gathered stitch along the left curved edge in the top image is for drawing into gathers in the next step):
As the other image above corresponds to the original instruction illustrations:
2. Gather BODICE RIGHT SIDE FRONT above seam, to large O.
Shows the hand basting stitch drawn to a gathered edge on the bodice left side front:
3. Turn under seam allowance on BODICE RIGHT FRONT from seam to O and pin over BODICE RIGHT SIDE FRONT, clipping to O. Slip-stitch securely.
4. Stitch BODICE LEFT FRONT to BODICE LEFT SIDE FRONT, below o at corner, matching VVV, clipping side front. Press open.
Shows The taped and gathered edge of bodice left side front joined in the seam with bodice left front:
5. Gather left side front from seam to first point, as illustrated.
6. Pin left side front to BODICE LEFT FRONT, matching VV, adjusting gathers. Baste and stitch. Press seam downward.
Shows the gathered and taped edge of bodice right side front before it is eased and stitched to the bodice right front:
7. Clip BODICE RIGHT FRONT to large O, stitch to BODICE LEFT FRONT below oo, matching O’s and V.
8. Gather BODICE LEFT SIDE FRONT above seam at oo to the triangle symbol as illustrated.
Detail shot of the gathered bust:
Tuesday, November 15, 2011
1930 Leaf Frock in the final stretch!
Have some lining of the flounces to do in order to conceal the white satin organza interfacing:
Waiting for a little more ribbon to arrive so I may finish the straps and add the last layer of leaves to the back panel. Adding that last layer of leaves to the back panel will really give it the volume that the original art portrays and it's a wrap!
Thursday, November 10, 2011
Teaching in Phoenix for ASDP this Saturday
I am doing a session focusing on flattering figure challenges using vintage details with transverse lines.
Examples of the exercises I will go over in class using 1/2 scale patterns to hand sew on muslin are:
Breaking up a wide hip with a godet which is reinforced at the skirt waistline:
Reducing a large bustline using right angle seams faced with silk organza:
Increasing the shoulder line using a dropped sleeve and cut-away shoulder with a pointer on giving the cut-away shoulder a wider facing:
Augmenting a small bustline with horizontal gathers using rayon seam tape stays:
Play-down a protruding stomach with asymmetric lines using basting as a guide for sewing lapped seams:
Augment a smaller hip using transverse gathers. The tip here is to stay the skirt gathers before joining to the skirt yoke:
All are welcome to register, contact Phyllis Bergo of Quail Trail Designs, 480.812.9762
Sunday, October 2, 2011
Latest Multi-Size Pattern
Saturday, September 24, 2011
Making the (Leaf Evening Gown) Loop
First of all, when it comes to marking I am a BIG believer in marking via Tailor's Tacks...
The original instructions advise closing the Loop seam and then narrow hemming both Loop edges by hand. However, I narrowed hemmed these edges (by machine, but one could narrow hem at this point by hand as well) and then stitched the Loop closed:
The completed loop (this instruction is also applied to the loop for pattern E30-6719):
If one wishes for more structure to make the top part of the loop more stable, I recommend inserting 1/8" dowels cut to length into the fabric (at the back of the loop) between the top-most pleats.
Sunday, September 18, 2011
1930 Leaf Evening Gown Progress
A little peek into what I am doing with this pattern:
I managed creating 9 boat leaves within 18 minutes:
Here, you see the complete bodice with complete lining underneath:
This view demonstrates the two sizes of boat leaves I am using between the straps and the back panel. You can see the verigated nature of the scarlet/emerald ribbon I am using here as well:
Saturday, September 17, 2011
2011 Gatsby Photos
A few photos from the Art Deco Society of California's 27th Annual Gatsby Summer Afternoon.
Having just rolled up after hitching a ride with this fellow in fur:
A couple of ladies with their well behaved pet:
Miss Art Deco about to be crowned:
My dance partner 'Crazy Ed':
Aundrea in her smashing blue! The hat is from one of her mother's stash of fifty!
With my customer Debi Fry:
A little entertainment on the side:
Back view of my ribbon frock (click for larger image):
Monday, September 12, 2011
Ribbon Leaves
Here are the beginnings of my ribbon leaves for the 1930 Leaf Evening Gown. I am creating the leaves from two different widths of ribbon. That of a 2" width for the shoulder strap leaves and 3" width for the back train.
I followed instructions for vintage boat leaves provided by Carole Sidlow at RibbonStore.com (which are also included with the pattern):
Link to ribbon leaf instruction
Step 1:
Step 2:
Larger leaf (for the train):
Smaller leaf (for the shoulder straps):
A pair of leaves for the shoulder strap:
I followed instructions for vintage boat leaves provided by Carole Sidlow at RibbonStore.com (which are also included with the pattern):
Link to ribbon leaf instruction
Step 1:
Step 2:
Larger leaf (for the train):
Smaller leaf (for the shoulder straps):
A pair of leaves for the shoulder strap:
Subscribe to:
Posts (Atom)