Saturday, June 7, 2008

Vintage Fabric ReDux

I found a 1-2/3-yard piece of 36" wide circa 1950’s(?) 60's(?) Waverly interior fabric at a yard sale six years ago. Along its selvage is printed: 'A Waverly Bonded Glosheen'. It is a slightly polished, good grade of cotton and I sat on it, wondering how best to maximie it for whatever use I could eventually come up with.

A skirt! (I can keep sitting on it, yet have it use, ha!) To make the most use of it, I cut the piece in half and sewed the selvages as the side seams. I narrowly hemmed the bottom edge and folded a hem at the top nearly equivalent to the width of a waistband. I then fit at the top according to my waist measurement by creating box-pleats at the right and left sides of the front and back.
To get the skirt on and off, I left the back left box-pleat un-stitched and applied white hooks and eyes to each side of the box-pleat fold thus, making the waistband longer for me to get over the hips and yet close down with the hooks to fit at the waist.
Over timie, my daughter and I add Swarovski flatbacks here and there, plus a little hand embroidery to augment the French cafe print.
Makes for the Optimal Picnic Skirt-and is always a hit at every barbeque to which I wear it!


Front of the skirt:


Detail at the hooked box-pleat:

Saturday, May 31, 2008

Wool flannel lace-Why not?

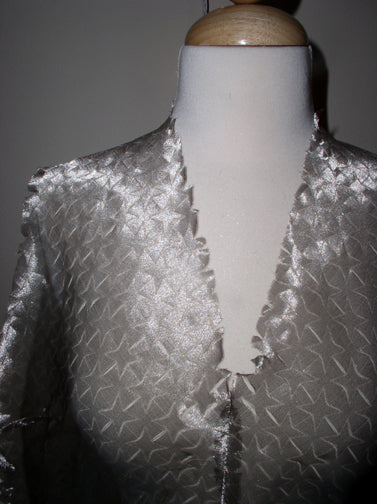
Cut this pattern into wool flannel with the laser cutter and same pattern via VBS. Settings are: 10% speed, 100% power, 3500 frequency on May 28, 2008...

Sunday, May 18, 2008

It's alive. It's alive... It's alive....

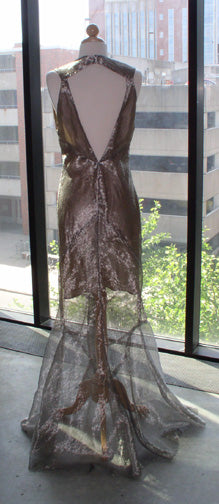
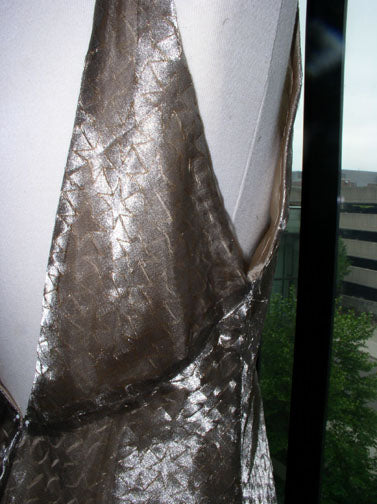
The fantastic etched metal silk gown...


Wednesday, April 16, 2008

Option Explicit Success!

First two panels etched today. Each 24"x36" panel took 50 minutes in the laser cutter. Settings are: 50% speed at 40% power with a frequency of 2500. The lens was cleaned yesterday, so I had to modify my test settings considerably as two fires resulted from using my tested settings from the days of a dirty lens! This post is mostly for my little self, but I will add photos of the gown in progress here once I have cut all panels... Early in-progress post. Also see this finished-state post. Wool Flannel Lace Experiment.

Wednesday, April 2, 2008

On the Boards-Spring 2008

I now have this wonderful pattern ready from my site:


I am currently working through this one from Germany, circa 1935 to have for you this June:


I have some more goodies up my sleeve for June and July.

Tuesday, April 1, 2008

Option Explicit-Part Drei 'Fray Factor'

I was finally able to experiment cutting the metal silk a couple weeks ago. It was very satisfying and I have determined the correct laser settings, but I learned that I cannot make a completely clean cut through the fabric to pass it off well enough. The fray (at right) is too much! I have decided that simply etching the fabric with the laser-cut pattern is the way to go for an equally impressive fabric design as seen at left. Once I have every yard of the metal silk I need for the entire project, I will cut it into the 24x36 inch panels and have about 10 goes with the laser cutter. Stay tuned!

Wednesday, March 5, 2008

Option Explicit-Part Deux

Strength of (Fabric) Materials
I am studying Silk Metal Organza to prepare it for the parametric design to create my metal lace and the first step is to do proximity tests on it. The fabric is 80% metal and 20% silk-the color is silver.
Since I am essentially 'de-materializing' the material to create the new metal lace, I wish to see how close I can cut the figures in my pattern design without the fabric loosing structural integrity.
As shown below, using 'analogue' dressmaking shears, the cuts are too close together at 1/8" apart, making the fabric too weak and it breaks between openings. Looks as though the minimum agreeable distance between figures is 1/4".

Also interesting to note at this preliminary stage is the limitation the machinery imposes on the design at a couple of scales. On the smaller scale, my 44" wide cut organza (I need a total of 3-1/2 yards) has to fit into a 24" by 36" laser cutting bed, so I have to give up 8" of manufactured width and one selvage in order to even cut the design into it with the laser. Also, I cannot do a long run of yardage at one time. The fabric has to be cut to 24" by 36" pieces which are totally flat.
On the larger scale, this affects the overall design of the frock. I will have to make the seams from piecing these 24x36 sections together part of the overall design which works well in the scheme of the 1930's-the decade this frock pattern originated. Also, I am cutting the frock on the bias which requires piecing much of the time anyway-more later!
Also see the finished-state post.