Friday, August 27, 2010

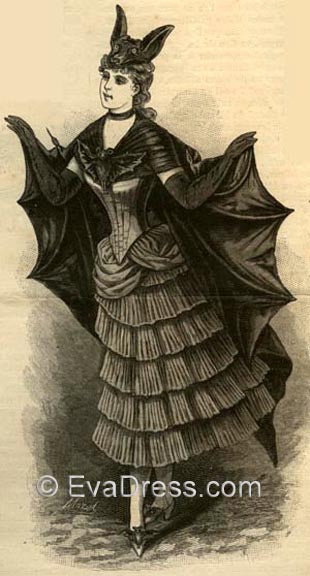
1887 Bat Costume Pattern is Ready!


Quick snapshots of the silk sample shown here without the gloves (gloves process blogged here) and polonaise. Also, the fichu is not yet stayed to the back of the corset and a band on each arm from which to hang the wings has yet to be applied.

The bat costume sans wings: Finalizing the drape of the skirt polonaise:


My daughter fashioned this little bat in paper and fabric mâché.


Front view taken Oct. 6, 2012 at Prescott's Citizen's Cemetary Tour (click images for larger view):


I will post the process of making the gloves separately.

Friday, July 9, 2010

1887 Bat Crinoline Progress

I have been draping away all summer as I plan to have this bat crinoline costume ready by mid-August!


I experimented with the wing armature,so you will see that soon and will have more to add as I steel the crinoline and build the final skirt of silk gazar!

7.14.10 Crinoline Update
The progress of tipping the top steels and inserting them into the hoop skirt for the bat crinoline:

These are tailor tack markings for the placement of the steel channel.


I tipped the ends of the top two steels with tips I use in spring steel corsetry.


The complete bell-shape crin to go under the bat skirt.

7.19.10 Update
I expect to have this pattern ready for release mid-August, so for those of you wanting to get as early start as possible on this Victorian Bat Costume, I recommend you build the hoop skirt and optional bustle pad using Laughing Moon's pattern #112 Hoops and Bustles (available from AgelessPatterns.com and I am sure elsewhere). I used View A, the bell shape with View F bustle pad. I built my hoop skirt in black cotton twill and omitted the top steel to accommodate the polonaise.

7.26.10 Update
I interpreted the texture on the skirt to be knife plaits. I have hand-tucked them for a slight un-evenness reminiscent of those shutters one sees falling off the windows of haunted houses! This is most apparent in the muslin draping process, top image:


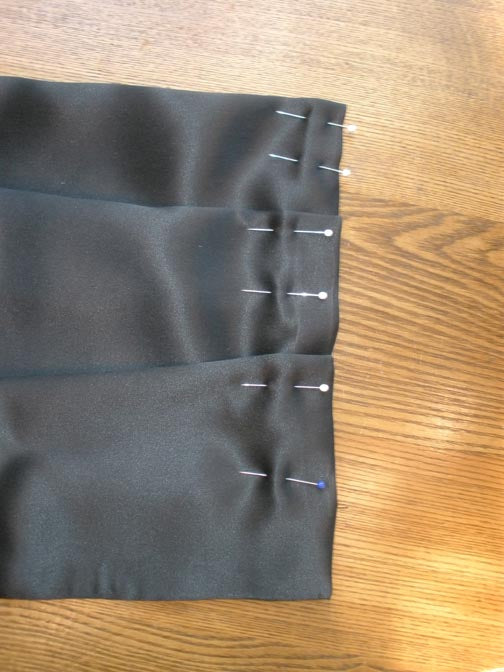
The process of hand-pleating and hand-basting the silk gazar:


I stitch each line of pleats on the placement lines marked from the pattern. This means the top edge of each flounce is 1" above each placement line:


8.2.10 Update
Here are 4 of the 6 layers in pleated silk gazar on the skirt. I have since completed all of the pleating. As I wait for the skirt lining (silk habotai) to arrive, I am draping the fichu (images soon to come).


8.5.10 Update
The completed skirt as I am draping the polonaise. I achieved the texture in the flounces by narrowly hemming them after pleating:


8.12.10
Just a little side note about the corset:
Historically, the bodice of the ensemble would properly have been a boned evening bodice (aced at the back) worn over a corset. For the ease of creating this costume, I have simply specified and furnished pieces for a shaped corset the basque of which is worn lapped over the skirt at the front.
One is certainly able to create a full 1887 corset and wear it under an evening bodice created from the pieces I am furnishing in this pattern.

8.15.10
The complete fabric wing waits for the next step:


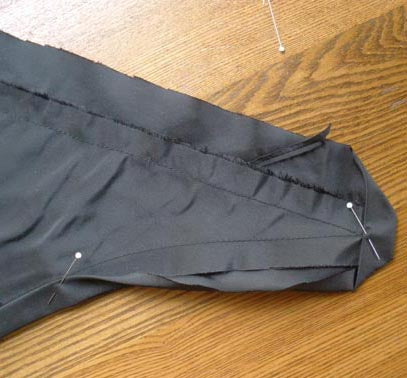
Hand basting the outer edge of the wing fabric and facing together:


Top-stitching the basted wing fabric and facing together forming tubing channels for the wing armature:


8.17.10
Working up the double-bias edge on the wings. If you are not comfortable with mitering double-bias, you can use single-bias binding which you may find easier.


8.25.10
You see the final labors on the silk wings. I used 110 gram silk taffeta for the wings. The double-bias edge is self-fabric which you see being rolled over the shaped wing edges:


After catch-stitching the rolled bias to the lining of each wing, I chamfered the end of the vinyl tubing to reduce resistance. I then inserted it into the channels sewn at each wing section seam:


Because the top-most channel is the most curved, I recommend inserting the vinyl there first and work your way down each wing. The short section of vinyl to be inserted at the center back seam should be executed last.

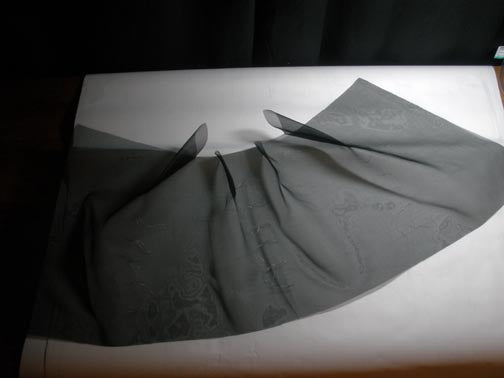
The draping of the final gazar fichu:

Stitching the darts into the fichu shapes the neck edge. It is then finished with a narrow hem.

The fichu is pleated down.

The front edges are then pleated down to 1-3/4" and will then be finished with double-bias binding.

9.1.10
Pleating the polonaise:


and draping it to the final ensemble:

Sunday, June 27, 2010

Contemporary Vintage

Just looking back a bit here, the September 2009 Vogue issue caught my eye for the spread of designer-wear inspired by design lines of 1942.
I found this piece interesting for what I believe it reinforces good, vintage details in contemporary wear.

I like that the basic lines of the jackets are so easy to see in the garments as compared to the two pattern fronts below. The soft details the designers added look easy to add for nice embellishment.


The 40's never go out of style...

Friday, June 4, 2010

Pattern Sizes - Vintage vs. Contemporary

A really good suggestion was brought to me during my lecture on vintage patterns last night at Treadle Yard Goods.

Edith Gazzuolo suggested I include a chart on my web site for comparison between vintage pattern and contemporary pattern sizing standards.

I hope it will reduce confusion when choosing vintage patterns for those who are only familiar with contemporary patterns.

A brief example would be to say that a vintage size 18 pattern closest corresponds with a contemporary pattern size 14 to fit a 36" bust, although the remaining dimensions vary between the waist and hip. When comparing vintage and contemporary pattern standards, I recommend purchasing a vintage pattern as close to the bust size as possible since the remaining adjustments will be less difficult.

Until I can post this information on the site, I have included it here:

Women's Vintage Patterns pre-1958
(hip measurement is taken 7" below the natural waistline)

size 12=30" bust, 25-26" waist, 33" hip
size 14=32" bust, 26" waist, 35" hip
size 16=34" bust, 28" waist, 37" hip
size 18=36" bust, 30" waist, 39" hip
size 20=38" bust, 32" waist, 41" hip
size 40=40" bust, 34" waist, 43" hip
size 42=42" bust, 36" waist, 45" hip
size 44=44" bust, 38" waist, 47-1/2" hip
size 46=46" bust, 40" waist, 50" hip
size 48=48" bust, 42" waist, 53" hip


Misses's Contemporary Patterns according to Vogue Patterns
(hip measurement is taken 7-9" or, at fullest part of the body below natural waistline)
NOTE: Size '8' has been ommitted due to the fact that there is no women's vintage size to correspond with a 31-1/2" bust. Such sizes were issued as a junior standard in the vintage pattern realm, not a women's standard.

size 6=30-1/2" bust, 23" waist, 32-1/2" hip
size 8=(see note above)
size 10=32-1/2" bust, 25" waist, 34-1/2" hip
size 12=34" bust, 26-1/2" waist, 36" hip
size 14=36" bust, 28" waist, 38" hip
size 16=38" bust, 30" waist, 40" hip
size 18=40" bust, 32" waist, 42" hip
size 20=42" bust, 34" waist, 44" hip
size 22=44" bust, 37" waist, 46" hip
size 24=46" bust, 39" waist, 48" hip
size 26=48" bust, 41-1/2" waist, 50" hip

Thursday, May 27, 2010

Trunk Show/Grading Patterns at Treadle UPDATE

The confirmed date and time for my trunk show at Treadle Yard Goods in Minneapolis is Thursday, June 3 from 6-8 p.m. I will give a lecture to introduce vintage patterns and have the trunk show going with sample garments cut from many of my multi and single size patterns. The fee for that session is $10/person. Please call Treadle Yard Goods 651.698.9690 to make arrangements for attendance that evening.

Also, the grading vintage patterns session for Friday, June 4 will be 6-9 p.m. Spots are limited and reservations with the $35 fee is needed for attendance. Since the evening session is nearly full, we have added an afternoon session running from 1-4 p.m.

I recommend attendants bring a vintage pattern with which they are currently working or are considering working so they can follow along in the re-sizing instruction. I look forward to seeing you in Minnesota!

Sunday, May 23, 2010

I Am Teaching at 17th Annual ASDP Conference

I am teaching a 'Working with Vintage Patterns' session at the Association of Sewing and Design Professionals Educational Conference Saturday, October 16, 2010 from 8:30 a.m. to 4:30p.m. It will be held at the Crowne Plaza Hotel & Exhibition Center, Meadowlands in Secaucus, New Jersey.

I plan to spend the first part of the session introducing vintage patterns, some of their characteristics and demonstrate how vintage patterns can serve as a unique tool for contemporary couture.

Most of the session will be devoted to student hands-on in learning how to grade complicated pattern pieces using a sample pattern which is part of the kit for this class. We will also move into the first muslin iteration to learn working with marking techniques attributed to vintage patterns and for testing the first paper pattern grading effort.

My session is open to all levels of sewing ability, although the pattern work will be geared toward the more advanced sewing professional.

If one is planning to attend this event, I encourage bringing an original vintage pattern with which I may help for more individual advice. I recommend the user first trace the original onto pattern trace paper and bring the original along with the copy, if possible.

Thursday, May 20, 2010

Trunk Show/Teaching in Minneapolis

The confirmed date and time for my trunk show at Treadle Yard Goods in Minneapolis is Thursday, June 3 from 6-8 p.m. I will give a lecture to introduce vintage patterns and have the trunk show going with sample garments cut from many of my multi and single size patterns. The fee for that session is $10/person. Please call Treadle Yard Goods 651.698.9690 to make arrangements for attendance that evening.

Also, the grading vintage patterns session for Friday, June 4 will be 6-9 p.m. Spots are limited and reservations with the $35 fee is needed for attendance. Since the evening session is nearly full, we have added an afternoon session running from 1-4 p.m.

I recommend attendants bring a vintage pattern with which they are currently working or are considering working so they can follow along in the re-sizing instruction. I look forward to seeing you in Minnesota!