Sunday, September 18, 2011

1930 Leaf Evening Gown Progress

A little peek into what I am doing with this pattern:


I managed creating 9 boat leaves within 18 minutes:


Here, you see the complete bodice with complete lining underneath:


This view demonstrates the two sizes of boat leaves I am using between the straps and the back panel. You can see the verigated nature of the scarlet/emerald ribbon I am using here as well:

Saturday, September 17, 2011

2011 Gatsby Photos

A few photos from the Art Deco Society of California's 27th Annual Gatsby Summer Afternoon.

Having just rolled up after hitching a ride with this fellow in fur:


A couple of ladies with their well behaved pet:


Miss Art Deco about to be crowned:


My dance partner 'Crazy Ed':


Aundrea in her smashing blue! The hat is from one of her mother's stash of fifty!


With my customer Debi Fry:


A little entertainment on the side:


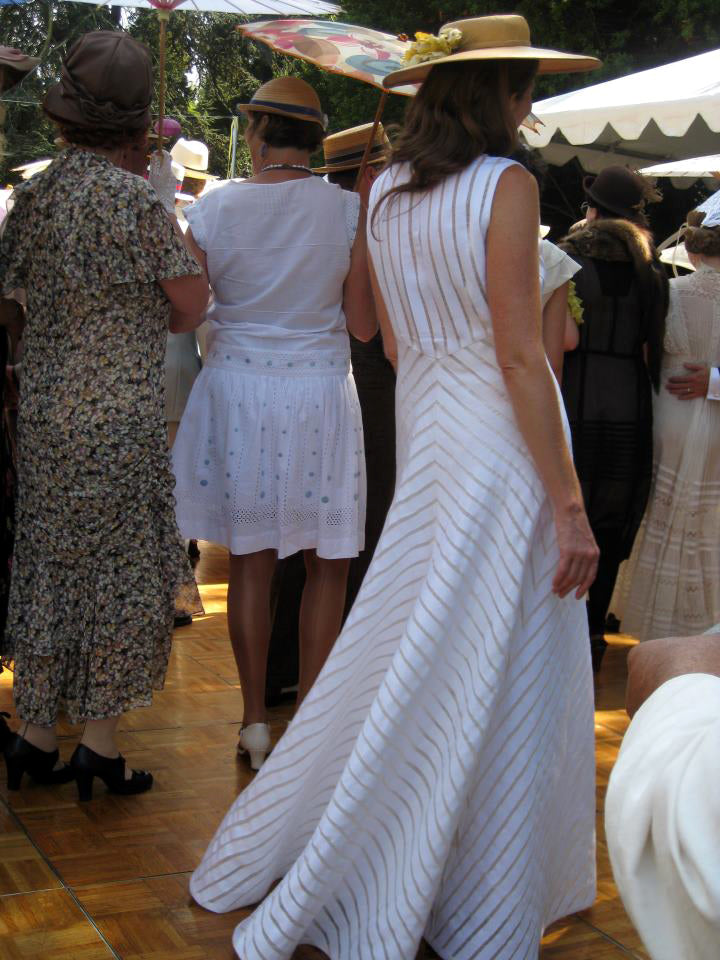
Back view of my ribbon frock (click for larger image):

Monday, September 12, 2011

Ribbon Leaves

Here are the beginnings of my ribbon leaves for the 1930 Leaf Evening Gown. I am creating the leaves from two different widths of ribbon. That of a 2" width for the shoulder strap leaves and 3" width for the back train.

I followed instructions for vintage boat leaves provided by Carole Sidlow at RibbonStore.com (which are also included with the pattern):

Link to ribbon leaf instruction

Step 1:


Step 2:


Larger leaf (for the train):


Smaller leaf (for the shoulder straps):


A pair of leaves for the shoulder strap:

Sunday, August 21, 2011

Finished!!

The Gatsby Ribbon Frock is complete-

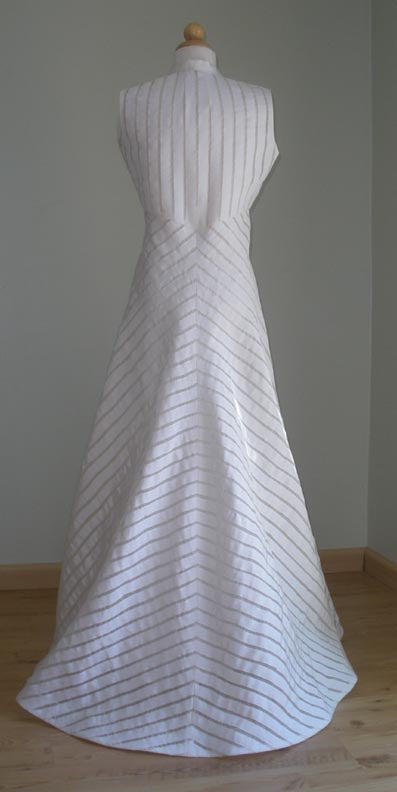
Back view of gown at ADSC's Gatsby Summer Afternoon, September 11, 2011 (Click for larger view):


Here are shots taken just before a trip to the drycleaner for some softening up:


Detail of the horsehair braid at hem:

Tuesday, August 16, 2011

Another Gatsby Ribbon Frock Update!

I am keeping all finishes invisible with silk organza.

Here is a single bias for the armseye...(the finished slip shows underneath in this view.)


For a perfect alignment to create the chevron effect, I cut the left skirt front from the right skirt front as I did for the bodice fronts:


Shows a detail of how I am trying to work out easing the bodice front to the skirt (I will gather it):


The center front skirt seam looks crooked in this photo, but it is not:


With the left side seam stitched, this image shows the fullness of the skirt hem:


I finished the waistline seam with organza double bias and pressed the seam upward.


When the gown is complete, I will have it dry-cleaned and pressed to remove any sizing in the ribbon and soften it overall.

I am now on the brink of assembling the entire skirt and gathering the front of that bodice down to it-more coming shortly!

Wednesday, August 10, 2011

After sooooo long.....the E30-371 Gown

I was in the throes of custom dressmaking when I started this cotton bobbinet gown 6 years (yes, YEARS) ago and although I had all the required materials (being the satin organza for finishing and white silk poppies), I never finished it.

When I opened the Year-End issue of Arizona Highways last November, I saw George Stocking's surreal image of white poppies along the Mogollon Rim and felt instantly compelled to retrieve the gown from the bottom of a box full of fabric.


These photos by Cynthia DeGrand


Here is instruction for how the front of that blouse neckline is draped:


BLOUSE

1. Pleat Blouse Front at shoulder, bringing line of o’s to meet O’s and stitching together inside. (Fig. U)

2. Stitch Blouse Front at center front below extension matching notches.

3. Make pleat, creasing on vertical o’s and bringing to meet center front. Baste and stitch on crosswise o at lower end of pleat. (Fig. U)

...and the detail image of that front neckline:

Wednesday, August 3, 2011

Photographic Follow-up, the 1887 Silk Bat

Photos by Cynthia DeGrand at cynthiadegrand.zenfolio.com