Due to the nature of the A-line wrap skirt pieces, I sewed all skirt seams in the directional manner. I obtained really good results when lining up the Pendleton woven pattern at the seams this way.
For the waistband, I 'floated' a length of petersham ribbon between the waistband and waistband facing per Susan Khalje's Build a Better Waistband. The article was printed in Threads Magazine issue #165 February/March, 2013. The image shows carefully sewing the waistband to the skirt without catching the petersham (basted in place) into the machine stitches.

I mentioned in my previous 2016 Make it with Wool post that I used Gail Patrice's Deni-fuse interfacing for the skirt facing with a highly satisfactory result. Here is a detail of the skirt drape:

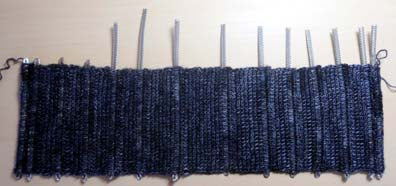
First image below shows the completely stitched front panel of the corselet. I tipped the bottom end of each bone and slid the stitches down to cut and tip the top end of each bone to length. Afterward, I used needle and thread to secure the crochet stitches to each bone tip. Following photo details the crocheted 'V' channel being sewn into place (by leaving a yarn tail on the crocheted channel that is four times the length of each corselet edge).


Back view of the corselet with buttons and ribbon lacing in place:

I often enjoy using bound edges as a finish, so I couldn't pass up the opportunity on the grand, draping collar of this Vogue blouse! I used self-fabric to finish as such. Following photo shows one of the two mitered corners:


The complete ensemble as shot by Barbara Trainor Photography at the Arizona state final, Nov. 20, 2015!

Nearly forgot the cherry on top! I fashioned this wool 'Gabardinia' from blouse scrap as a little whimsy to wear in my hair. I am afraid it doesn't show up in the angle in which the event photo was made:


No comments:
Post a Comment