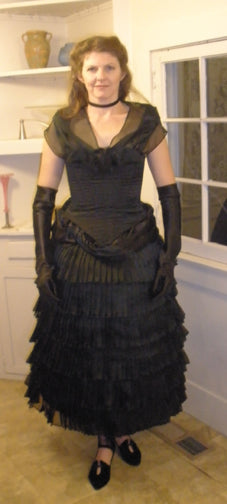
I am modifying the
1933 glove pattern to style gloves for my Victorian Bat Costume.
I am making them in my favorite fabric-a silk double-sided satin! The pieces included in the bat costume pattern are the same modified version of the glove pattern I am demonstrating here.
Just a little note about the size and turning to have the seams inside the glove. It is worth experimenting with the size as depending on the fabric you want to use for the gloves and how much space that fabric will take when putting the seams inside vs. outside. You may need to enlarge the glove pieces on a photocopier to get the room you need.
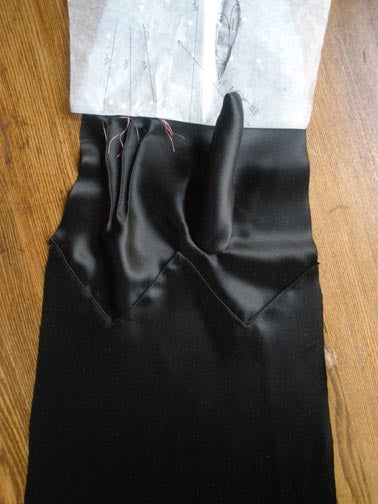
I am adhering to the original pattern's recommendation to refrain from cutting the fingertips and slashes until I have done work on the lower part of the glove and can then remove the pattern.


This means sewing the thumb on first, then stitching the nips.
I am departing from the original pattern's instruction to sew all seams of the gloves on the outside.
I will sew and turn them so seam allowances are inside because my silk satin will shred, but I leave this to one's personal preference. I used a very small stitch, 12 per inch to be exact.
I custom-shaped the thumbs as I sewed.

Overcasting all seam allowances is a must, but it goes quick.

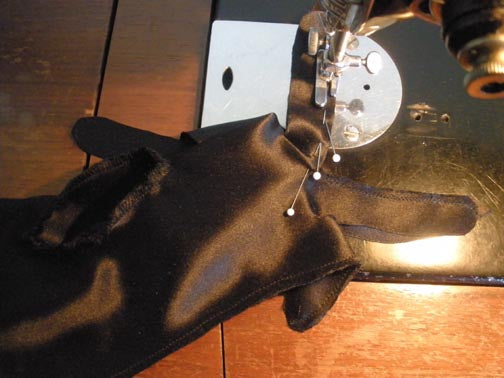
Shows how I pinned the thumb to the glove for easiest stitching under the machine:

To keep the bottom of the glove from shredding while working, I turn under the top edge of the cuff and top-stitch it to the glove.
The side seam is then sewn and one approaches the forks.
I stitched from points 5 to 6 along the line of the blue pin, but stopped stitching at both ends where the white pins are shown (approximately 1/8" from raw edges).

Stitching the forchette to the glove. Make sure the curved edge of each forchette is joined to the front side of the glove (shown below). Then, one sews the straight edge of the forchettes to the back side of the gloves.
Sewing the forchette along the front edge at index finger:

Sewing fork along front edge at little finger showing excess to be cut away (at far right):

I shaped the cuff of the gloves after all the stitching work was done in order to determine the best fit:

Images of finished gloves:
(Just a little shaping needed to touch up the thumb in this one)